
Uncategorized
Candle Making Temperatures Explained
Feb
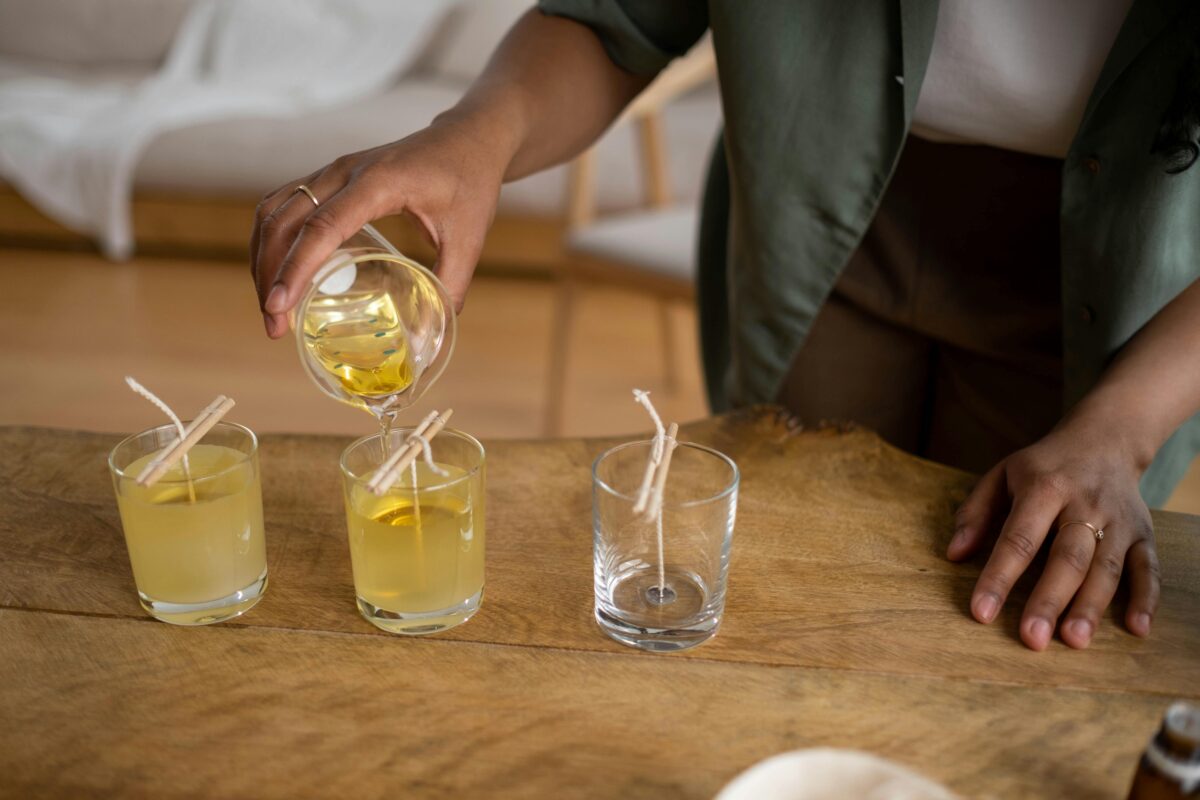
Precise heat control is the unseen engine of successful candle making, directly influencing everything from fragrance strength to a candle’s smooth, professional finish. Ignoring the critical candle making temperatures can lead to a host of frustrating issues, including poor scent throw, unsightly frosting, and adhesion problems like wet spots. This guide breaks down the science into three actionable stages, providing you with the exact thermal benchmarks needed for consistency.
We’ll walk through the specific temperature ranges for melting your wax base, binding fragrance oil, and achieving the perfect pour. Whether you’re working with temperamental soy or traditional paraffin, understanding these thermal milestones transforms the process from guesswork to a reliable craft. Let’s explore how mastering these heat points ensures your candles perform as beautifully as they look, every single time.
Why Temperature Control is Non-Negotiable
Temperature dictates the physical chemistry of your candle. Adding fragrance oil when your wax is too cool prevents proper molecular binding, leading to oil separation, weak scent throw, and potential pooling of flammable liquid on the surface. Conversely, excessively high candle pouring temperatures can scorch fragrance oils, evaporate their top notes, and increase shrinkage and sinkholes as the wax cools too rapidly.
Furthermore, each wax has a unique crystalline structure that sets at specific candle wax temperatures. Pouring at the wrong point disrupts this process, causing cosmetic flaws like pronounced frosting in soy wax or severe cracking in pillars. Precise thermal management is the key to ensuring fragrance stability, a smooth appearance, and a safe, clean-burning final product, making an accurate thermometer your most essential tool.
The First Critical Point: Melting & Melting Temperature
The foundation is a complete and gentle melt. For nearly all waxes, aim to heat your wax slowly until it reaches a clear, uniform liquid state at approximately 185°F (85°C). Using a double-boiler method or a dedicated wax melter ensures indirect, even heat distribution, which is crucial to avoid overheating or creating hot spots that can degrade the wax’s quality before you even begin.
It is vital to stir periodically during this phase to promote even heating. Never leave melting wax unattended. Use a reliable candy or digital thermometer to monitor the temperature closely; guessing is not an option. Achieving this clean, fully liquefied state at the proper wax melting point prepares a stable base for the next, most critical step: incorporating your fragrance.
The Fragrance Add Temperature: Where Scent is Captured
This is the single most important of all candle making temperatures for performance. For most container soy waxes, the ideal fragrance add temperature is between 180°F and 185°F (82°C – 85°C). Paraffin wax can typically accept fragrance slightly hotter, around 185°F – 190°F. At this specific thermal window, the wax molecules are open and receptive, allowing them to fully encapsulate and bind the fragrance oil for a strong, lasting scent throw.
Adding oil outside this range compromises your candle. If the wax is too cool, the oil won’t bind and may separate. If it’s too hot, the volatile aromatic compounds in the fragrance will flash off and evaporate, permanently weakening the scent. Once added, stir slowly and consistently for a full two minutes to ensure perfect, homogeneous integration before allowing the wax to cool to its pouring stage.
The Pouring Temperature: Setting Up for Perfect Tops
After fragrance is bound, the wax must cool to its ideal pouring temperature to set correctly. This temperature is wax-dependent and primarily determines the final surface texture. For container soy, a cooler pour between 135°F and 145°F (57°C – 63°C) promotes smoother tops and minimizes frosting. Paraffin and many blends, however, are often poured hotter, between 155°F and 165°F (68°C – 74°C), to achieve a glossy finish and prevent sinkholes.
Pouring too hot can cause excessive shrinkage away from the container walls (creating wet spots) and deepen sinkholes. Pouring too cool can result in a rough, lumpy surface and poor adhesion to the wick. Monitoring the cool-down phase with your thermometer is essential. The right candle pouring temperature allows the wax to contract gently and evenly, resulting in a level, professional-looking candle top ready for curing.
Wax-Specific Temperature Cheat Sheet
To eliminate guesswork, here is a quick-reference guide for the key candle making temperatures across popular wax types. These ranges are general benchmarks; always defer to your specific wax manufacturer’s instructions for optimal results. For soy wax, target a fragrance add at 180°-185°F and a pour between 135°-145°F to combat frosting. Paraffin wax performs well with a hotter add at 185°-190°F and a pour at 155°-165°F for a glossy finish.
Coconut wax blends, prized for smoothness, often require a similar add temperature to soy but may pour slightly cooler, around 125°-135°F. Beeswax is unique; due to its high melt point, it’s typically added with fragrance at 170°-175°F and poured very hot, around 155°-160°F, to prevent rapid cooling and ensure adhesion. Tracking these precise candle wax temperatures for your chosen material is the fastest path to consistency.
Essential Tools for Temperature Precision
Your control over candle making temperatures is only as good as your tools. A high-quality digital thermometer with a metal probe is non-negotiable for accurate, instant readings. Avoid glass candy thermometers that can break and contaminate your wax. A double-boiler setup—using a pouring pitcher inside a pot of simmering water—provides gentle, indirect heat essential for slow, even melting and precise cooling control.
For those making candles regularly, a dedicated electric wax melter or a Presto Pot with a temperature dial offers superior control and efficiency. Always use a dedicated thermometer for candle making, as residual smells or chemicals from kitchen tools can contaminate your wax. These tools form the foundation of thermal management, allowing you to execute each stage—melt, add, pour—at the exact recommended candle temperatures for flawless results.
Troubleshooting Common Temperature-Related Issues
If your candles have wet spots (where wax pulls away from the container), the cause is often a mismatch between the pouring temperature and the container’s ambient temperature. Pre-warming your jars with a heat gun or in a low oven can minimize this thermal shock, promoting better adhesion. A rough, bumpy top or severe sinkholes typically indicates you poured at too low a temperature, causing the wax to begin setting before it leveled.
Faint scent throw, despite using enough fragrance oil, frequently points to an incorrect fragrance add temperature. If the wax was too cool, the oil didn’t bind; if it was too hot, the scent compounds burned off. Excessive frosting in soy wax, while often cosmetic, can be reduced by carefully managing the cooling rate—slowing it down by placing candles in a warm, draft-free area after pouring at the correct temperature.
The Final Step: Curing and Patience
After perfecting your candle making temperatures and achieving a smooth pour, the final, critical phase is the cure. Curing is not cooling; it is the process where the fragrance oil fully integrates and bonds with the wax crystals over time. For most waxes, especially soy, a minimum cure of 1-2 weeks is essential for the scent to mature and achieve its maximum hot throw.
Rushing to test a candle before it has fully cured will give you an inaccurate reading of its true scent strength and burn performance. Patience during this phase allows the molecular bonds formed at your precise fragrance add temperature to solidify completely. This disciplined waiting period ensures the hard work you put into temperature control pays off with a candle that delivers a robust, true, and consistent fragrance experience.
Conclusion: Practice, Practice, Practice!
Mastering candle making temperatures is a fundamental skill that elevates your craft from amateur to professional. By meticulously controlling the three key phases—melting completely, adding fragrance at the precise binding window, and pouring at the temperature that ensures a perfect finish—you solve most common candle-making problems before they start. This thermal discipline is what guarantees a safe, beautiful, and high-performing product.
Remember that these guidelines are your starting blueprint. Always test and adjust based on your specific environment, wax batch, and fragrance oils. Equip yourself with a reliable thermometer, embrace the science of the process, and allow your candles the crucial cure time they need. With precise temperature control as your foundation, you can create candles with confidence, consistency, and exceptional quality.