
Uncategorized
How to Make Candles at Home (Step-by-Step Guide)
Feb
Introduction: Why So Many People Want to Learn How to Make Candles
Ever bought a candle that smelled amazing in the store but barely scented your room at home? That frustration is one of the biggest reasons people search for how to make candles themselves. Homemade candles give you control over scent strength, ingredients, and quality, without the high price tag.
Learning how to make candles at home is also easier than most beginners expect. With basic tools, simple wax, and a clear process, you can create candles that look professional, burn cleanly, and feel personal—whether for relaxation, gifts, or even a small business idea.
How to Make Candles: A Beginner-Friendly Overview
At its core, how to make candles involves melting wax, adding fragrance, placing a wick, and allowing the wax to cool and harden. While that sounds simple, small details—like temperature and wick size—make a big difference in how your candle burns and smells.
Candle making works because melted wax absorbs fragrance oil and releases it slowly when burned. By understanding this process early, beginners avoid common mistakes like weak scent throw, tunneling, or uneven burning that often discourage first-time candle makers.
Benefits of Making Candles at Home
One major benefit of learning how to make candles at home is cost control. Store-bought candles can be expensive, but homemade candles often cost less per unit once you own basic supplies, especially if you reuse containers.
Another advantage is customization. You can choose natural waxes, control fragrance strength, avoid harmful additives, and design candles that match your space or mood. This creative freedom is why candle making has become both a relaxing hobby and a profitable side hustle.
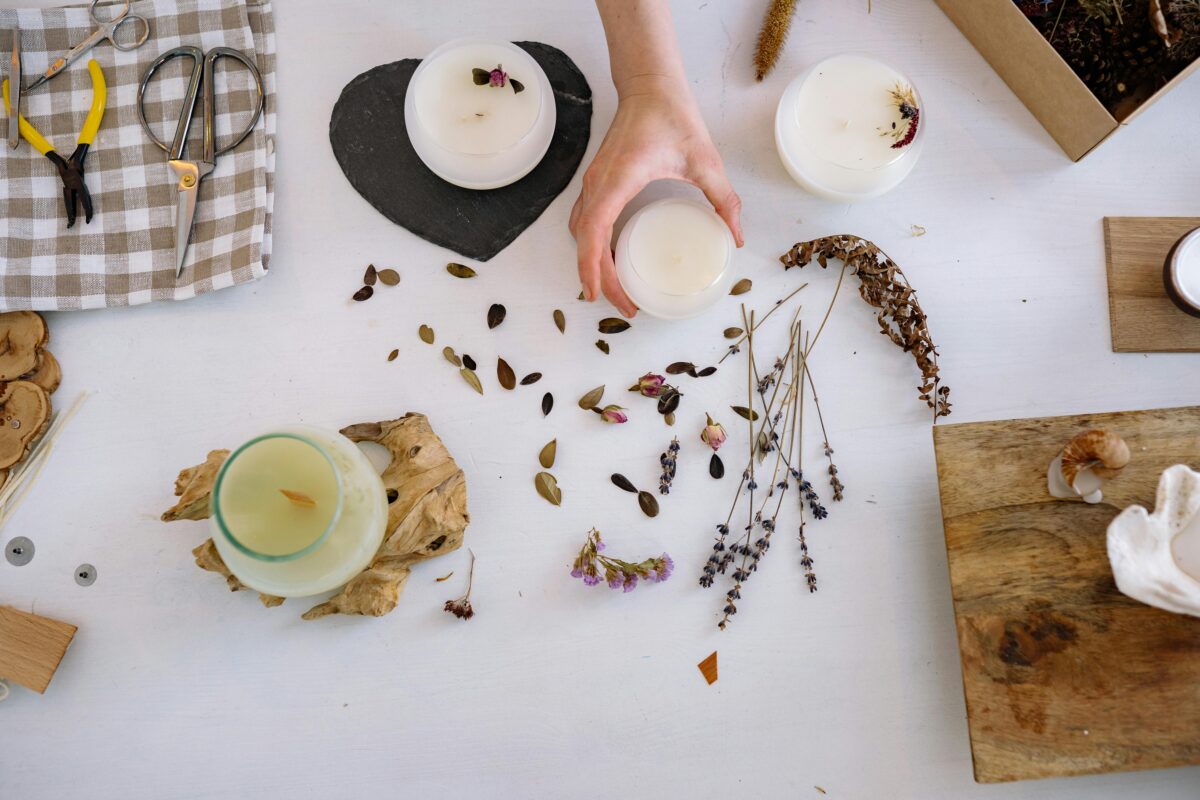
Essential Supplies Needed to Make Candles
Before learning how to make candles, you need a few basic supplies that directly affect candle quality. The essentials include wax, wicks, containers, fragrance oils, and a heat-safe pouring tool. Choosing beginner-friendly materials helps prevent common mistakes and saves time.
Soy wax is often recommended because it melts evenly and burns cleanly. Cotton or wooden wicks work well for home use, while glass jars or tins provide safe, reusable containers. Having the right supplies from the start makes candle making smoother and more predictable.
Types of Wax Used in Home Candle Making
Wax choice plays a major role in how to make candles that burn properly and smell strong. Soy wax is popular for beginners due to its slow burn and eco-friendly nature, while beeswax offers a natural honey scent and longer burn time.
Paraffin wax holds fragrance well but burns faster and is less natural. Coconut and blended waxes are newer options that improve scent throw and appearance. Understanding wax types helps you match your candle goals with the right material.
Choosing the Right Wicks for Homemade Candles
Wicks control how a candle burns, making them essential when learning how to make candles at home. A wick that is too small causes tunneling, while a wick that is too large produces smoke and uneven melting.
Cotton wicks are reliable for soy and paraffin wax, while wooden wicks create a soft crackling sound and modern look. Wick size should always match container width and wax type to ensure a steady, clean burn
Best Containers for Homemade Candles
When learning how to make candles, container choice directly affects safety and burn quality. Heat-safe glass jars, ceramic containers, and metal tins are the most reliable options because they withstand high temperatures without cracking.
Containers should always have a wide, stable base to prevent tipping. Reusing jars is possible, but they must be thoroughly cleaned and free of cracks to ensure your homemade candles burn safely and evenly.
Safety Tips Before You Start Making Candles
Safety is a key part of understanding how to make candles at home correctly. Melt wax slowly using a double boiler and never leave it unattended, as overheated wax can become flammable.
Always work on a heat-resistant surface and keep water away from hot wax. Wearing gloves and keeping pets or children out of the workspace reduces the risk of spills, burns, and accidents.
Step-by-Step Guide on How to Make Candles at Home
A clear process is essential when learning how to make candles successfully. Each step—from preparing tools to pouring wax—affects how the candle looks, smells, and burns once finished.
Breaking candle making into simple steps helps beginners stay organized and avoid rushing. This approach ensures better results and builds confidence as you move from your first candle to more advanced designs.
Step One: Preparing Your Workspace
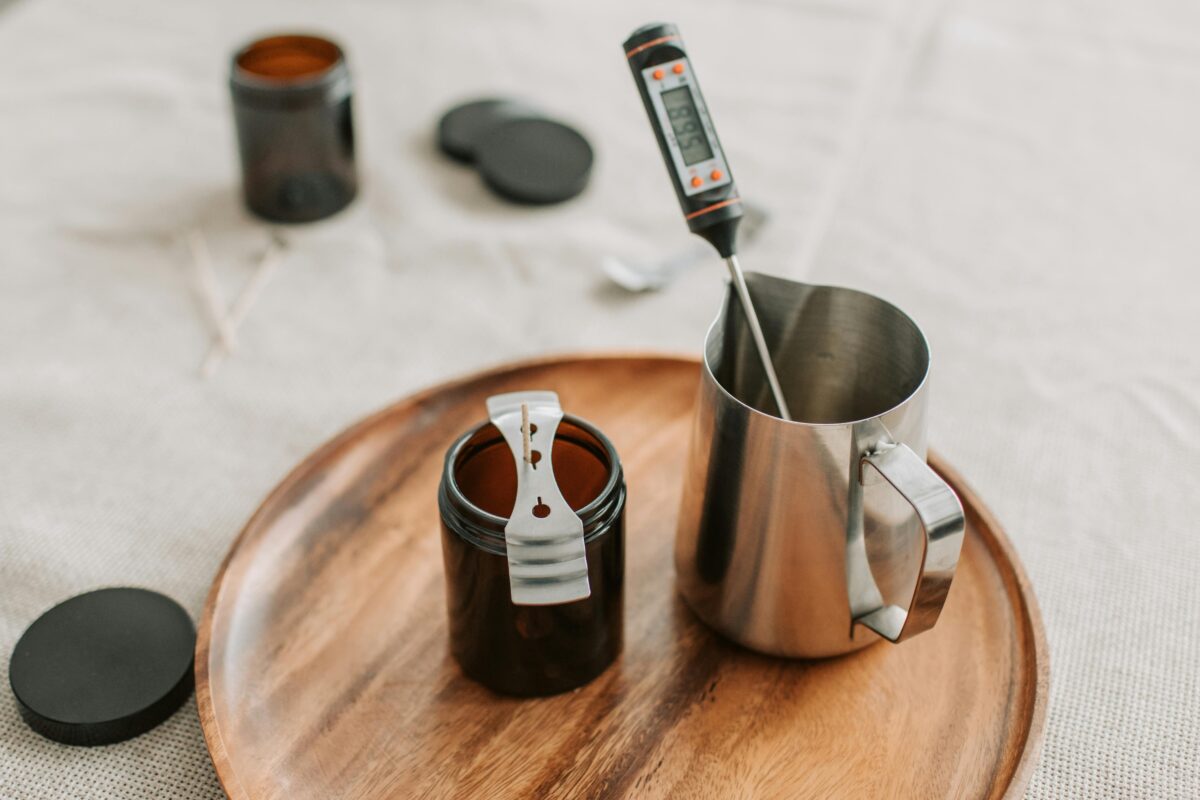
Before starting how to make candles, set up a clean, flat, and heat-resistant workspace. Gather all supplies in advance, including wax, wicks, containers, thermometer, and fragrance oils, to avoid interruptions during pouring.
Line your surface with parchment paper or newspaper to catch spills. Secure your container and center the wick using a wick holder or chopsticks to ensure the candle burns evenly once finished.
Step Two: Melting the Wax Correctly
Melting wax properly is critical when learning how to make candles at home. Use a double boiler and heat the wax slowly until fully melted, usually between 170°F and 185°F depending on wax type.
Stir gently to avoid air bubbles and never microwave wax in an open container. Consistent temperature control helps the wax hold fragrance better and prevents surface imperfections after cooling.
Step Three: Adding Fragrance and Color
Fragrance oils should be added once the wax cools slightly, usually around 160°F. This step in how to make candles ensures the scent binds well to the wax without evaporating too quickly.
Add color sparingly and stir slowly for even distribution. Too much dye can affect burn quality, so small adjustments create cleaner, more professional-looking candles.
Step Four: Setting the Wick Properly
Setting the wick correctly is essential when learning how to make candles that burn evenly. Attach the wick to the center of the container using wick stickers or a small amount of melted wax to keep it secure.
Keep the wick upright and straight using a wick holder while pouring. A centered wick prevents tunneling and ensures the candle melts evenly across the surface.
Step Five: Pouring Wax into Containers
Pouring wax slowly is a key step in how to make candles at home without air bubbles or cracks. Tilt the container slightly and pour in a steady stream to reduce surface imperfections.
Leave a small amount of wax in the pot for later touch-ups. This extra wax is useful for fixing sinkholes that may form as the candle cools.
Step Six: Cooling and Curing the Candle
Cooling is where patience matters most when learning how to make candles. Let candles cool at room temperature for several hours without moving them to avoid uneven surfaces or cracks.
After cooling, allow the candle to cure for at least 24 to 72 hours before burning. Proper curing improves scent throw and burn performance, especially for soy-based candles.
Different Candle Types You Can Make at Home
Learning how to make candles opens the door to many styles, each with unique benefits. Container candles are the easiest for beginners because they require minimal shaping and offer better control over burning.
Pillar candles, votives, and tealights require molds and more precise temperature control. Starting with simple types helps beginners master the basics before experimenting with advanced candle designs.
Soy Candles for Beginners
Soy candles are one of the most popular options when learning how to make candles at home. Soy wax melts at lower temperatures, burns longer, and produces less soot than many other waxes.
Because soy wax holds fragrance well, it’s ideal for scented candles. Beginners also appreciate how forgiving soy wax is when it comes to minor temperature mistakes.
Beeswax Candles Explained
Beeswax candles offer a natural alternative for those learning how to make candles without synthetic ingredients. They burn longer and emit a subtle honey scent, even without added fragrance oils.
Beeswax requires higher melting temperatures and stronger wicks. While slightly more advanced, it’s a rewarding option for eco-conscious candle makers.
Scented vs Unscented Candles
When learning how to make candles, choosing between scented and unscented candles affects both process and purpose. Unscented candles are simpler to make and ideal for beginners who want to focus on clean burning and appearance.
Scented candles require precise fragrance measurements and temperature control. While slightly more advanced, they allow creativity and personalization, making them perfect for gifts and home ambiance.
Common Problems When Learning How to Make Candles
Many beginners struggle with issues like tunneling, cracking, or weak scent throw when learning how to make candles at home. These problems often come from incorrect wick size, pouring temperature, or poor curing time.
Understanding these mistakes early saves frustration. Small adjustments—like using the right wick or allowing candles to cure longer—can dramatically improve candle performance.
Why Candles Crack or Sink
Cracks and sinkholes occur when wax cools too quickly or unevenly. This is common in how to make candles when pouring wax that is too hot or cooling candles in a cold environment.
To fix this, allow candles to cool slowly at room temperature. Using leftover wax for a second pour helps create a smooth, professional finish.
Fixing Tunneling and Uneven Burning
Tunneling happens when the wick is too small or the candle isn’t burned long enough initially. In how to make candles at home, the first burn is crucial for setting the melt pool.
Choosing the correct wick size and allowing the candle to burn until the entire surface melts prevents future tunneling. This simple habit improves candle lifespan.
Tips to Improve Candle Quality at Home
Improving candle quality starts with consistency. Measure wax, fragrance, and temperatures carefully when practicing how to make candles, as small variations can affect results.
Using high-quality fragrance oils and allowing proper curing time leads to stronger scent throw and cleaner burns. These small details separate average candles from great ones.
How to Get Stronger Scent Throw
Strong scent throw depends on wax type, fragrance load, and curing time. Soy wax performs best when fragrance oils are added at the correct temperature during how to make candles.
Allowing candles to cure for several days improves scent release. Rushing this step is one of the most common beginner mistakes.
Making Candles That Burn Longer
Long-burning candles come from proper wick sizing and high-quality wax. In how to make candles at home, trimming the wick to ¼ inch before each burn also extends candle life.
Slow-burning waxes like soy or beeswax naturally last longer. Combined with good candle care, they provide better value and performance.
Cost Breakdown of Making Candles at Home
Understanding costs is important when learning how to make candles regularly. Initial supplies may seem expensive, but costs drop significantly as materials are reused.
On average, homemade candles cost less per unit than store-bought ones, especially when making multiple candles at once. This makes candle making both economical and rewarding.
Is Candle Making Cheaper Than Buying Candles?
For frequent candle users, learning how to make candles at home is usually cheaper long-term. Bulk wax and reusable containers significantly reduce per-candle cost.
Handmade candles also offer higher quality and customization, making them more valuable than mass-produced options.
Eco-Friendly Candle Making Practices
Eco-friendly candle making focuses on natural waxes, clean-burning wicks, and reusable containers. When learning how to make candles, choosing soy or beeswax reduces environmental impact.
Recycling jars and avoiding synthetic dyes further improves sustainability. These practices create candles that are better for both your home and the planet.
Conclusion: Final Thoughts on Learning How to Make Candles
Learning how to make candles at home is a practical, creative, and rewarding skill. With simple tools and the right process, anyone can create high-quality candles that look and smell amazing.
Whether you’re making candles for relaxation, gifts, or profit, mastering the basics builds confidence and consistency. Start simple, practice patience, and enjoy the process.